If you’re looking for a more music-focused app than what the standard Plex app provides, Plexamp is probably the answer. Plexamp is my go-to streaming app on my iPhone for many reasons.
The Plexamp app is polished, intuitively designed with a layout that doesn’t make you spend too much time trying to understand where to find settings, and it works perfectly for streaming Bandcamp purchases I’ve added to my Plex server.
Plexamp also provides some features that are not typically found on other music streaming apps:
- Built-in EQ with a huge array of AutoEQ presets available
- Options to fine-tune the appearance of the app
- Gapless playback and Sweet Fades (really an amazing feature)
- Sonic Explorations using OpenAI and Sonic Sage
- Built-in preamp
- Built-in Limiter
- Separate streaming quality and download options for WiFi and cellular
Really, the list goes on and on.
Even with all those options, setting Plexamp up the way I like is straightforward and quick. It’s just a very well-designed and well-built piece of software (not perfect, but pretty close).
If the cheeky notes sprinkled throughout the app are anything to go by, the Plex team has treated this project as a labor of love, and that love is further proven by their willingness to bring Plexamp to the Raspberry Pi in a headless configuration.
Going headless with Plexamp
I run my Plex server in a Headless configuration using a Raspberry Pi. This works seemlessly when using Plexamp from my iPhone, but it’s been a struggle to expand my network using Plexamp because, until very recently, Raspberry Pi users were limited to some very hacky methods of installing and using headless Plexamp with a Raspberry Pi.
Now that there is an official build from Plex it’s much more straight-forward to install and use Plexamp Headless, though it still took me a bit of trial and error to refine the process. This step-by-step guide is one way to get started with a Headless Plexamp Raspberry Pi project in the simplest terms possible.
If you’re new to headless Plex servers, Raspberry Pi computers, Terminal and command-line interface tools, I would recommend beginning with our Complete Guide to creating a Headless Plex Server with Plexamp endpoints using a Raspberry Pi. Working through those articles in sequence will introduce you to the tools and concepts you’ll need to go Headless with Plex and Plexamp.
Once you have Plexamp installed on your Raspberry Pi you might want to enable updates for the software. To do that you’ll want to follow the steps we’ve documented in another post – How to enable updates for Headless Plexamp on Raspberry Pi – get the latest Plexamp features
Follow the development of this essential add-on to your Plex Media service on the Plexamp homepage and read the changelog at the Plex Forum.
Install Headless Plexamp for your Raspberry Pi to create a Plex endpoint
Use this guide to set up a streaming endpoint in your home network using Plexamp and a Raspberry Pi 3 or Raspberry Pi 4. Stream from your own personal digital media library.
Project Cost: $85 – $150
Total Time: 10 Min.
Tools and Supplies
Here is a list of tools and equipment that you should have on hand before you begin this project:
Tools
-
A Plex Account
If you’re following our Complete Guide to creating a Headless Plex Server with Plexamp endpoints using a Raspberry Pi you’ll already have a headless Plex Server up and running.
Note: Plexamp is an add-on to your Plex Media Server. A Plex Pass is required to run Plexamp in a Headless configuration.
Supplies
-
A Raspberry Pi 3 or 4
If you don’t have a Raspberry Pi handy, I would recommend buying a Raspberry Pi 4 Starter Kit from CanaKit. They offer a variety of kits, but each configuration will include everything you’ll need to get started. In writing this tutorial I’m using a Raspberry Pi 4 with 4GB of RAM, but I’ve read user reports that a Raspberry Pi 3B+ and up should work, and reports that 2GB of RAM is sufficient.
-
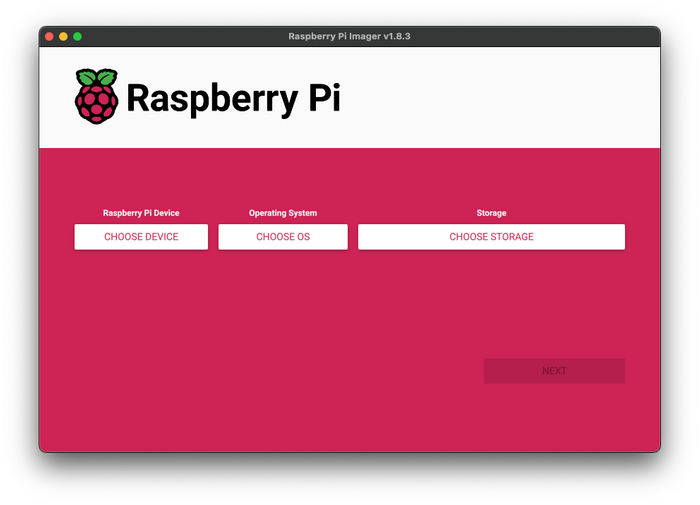
Install Raspberry Pi OS
If you’re following our Complete Guide to creating a Headless Plex Server with Plexamp endpoints using a Raspberry Pi you should already be familiar with Raspberry Pi Imager.
If you need a refresher on what Raspberry Pi Imager is and how to use it you should revisit the guide A Beginner’s Guide to Installing Raspberry Pi OS.
For this guide I’m using Raspberry Pi OS Lite (64-bit), but as of Plexamp 6.4.0 you can also use the 32-bit version of Raspberry Pi OS if you prefer.
In the advanced settings fill out all the necessary information. To keep things simple your username for this project should be pi. If your username is different there will just be an additional step to take.
After Raspberry Pi OS has been installed on your Micro-SD card you can insert it into your Raspberry Pi and power it on.
Install Raspberry Pi OS -
SSH into your Raspberry Pi
With Raspberry Pi OS installed on your Micro-SD card and your Raspberry Pi powered on you’ll want to make sure you can SSH into the Pi.
If you’re following our Complete Guide to creating a Headless Plex Server with Plexamp endpoints using a Raspberry Pi you should already be familiar with how to SSH into your Raspberry Pi, but if you need a refresh you can visit the guide How To SSH or Secure Shell into your Raspberry Pi
On your computer launch your command-line interface app (Terminal, in my case) and enter the following command, where username is the SSH username and hostname is the hostname you created in Raspberry Pi Imager:
ssh username@hostname.localThen hit Enter and follow the prompts as you normally would.

SSH into your Raspberry Pi -
Update and upgrade your Raspberry Pi
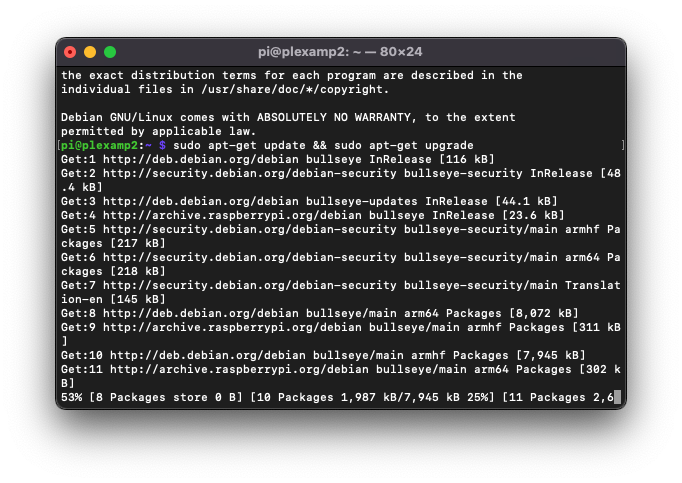
Run the following command to ensure your Raspberry Pi Operating System is up to date:
sudo apt-get update && sudo apt-get upgradeSometimes this process can take a few minutes. As long as your Terminal window is still scrolling everything should be working as intended, but watch for prompts where you may need to acknowledge some installations and upgrades.
Update and upgrade your Raspberry Pi -
Use Terminal to Install Node js
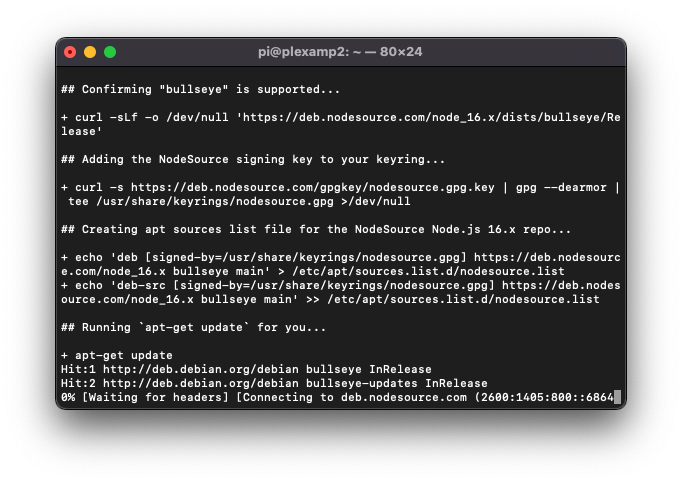
As of Plexamp version 4.10 Headless Plexamp requires NodeJS 20 to run. It’s totally fine if you’re not familiar with Node JS, we’re just going to get it installed and then you likely won’t have to do anything with it again 😊
To install NodeJS 20, run the following commands in your Terminal window:
sudo apt-get install -y ca-certificates curl gnupg && sudo mkdir -p /etc/apt/keyringsHit ENTER
curl -fsSL https://deb.nodesource.com/gpgkey/nodesource-repo.gpg.key | sudo gpg --dearmor -o /etc/apt/keyrings/nodesource.gpgHit ENTER
Then we’ll select version 20 with the following command:
NODE_MAJOR=20Hit ENTER
Then:
echo deb [signed-by=/etc/apt/keyrings/nodesource.gpg] https://deb.nodesource.com/node_$NODE_MAJOR.x nodistro main | sudo tee /etc/apt/sources.list.d/nodesource.listHit ENTER
Then, finally run this command:
sudo apt-get update && sudo apt-get install -y nodejsHit ENTER
Use Terminal to Install Node js -
Use Terminal to install Headless Plexamp
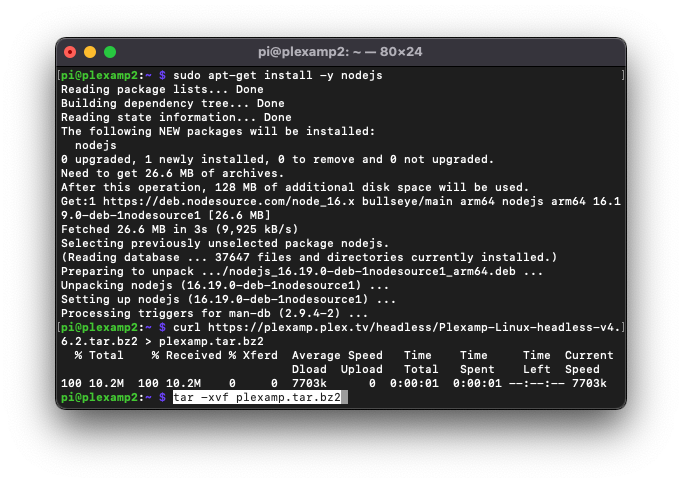
The Headless Plexamp package for Raspberry Pi is available from the Plexamp website, but we’re going to use a curl command as a shortcut to grab and unzip the latest version directly into our Raspberry Pi.
Copy and paste the following command in terminal to download the Plexamp package:
curl https://plexamp.plex.tv/headless/Plexamp-Linux-headless-v4.10.1.tar.bz2 > plexamp.tar.bz2Hit Enter
Now you can unzip the package with the following command:
tar -xvf plexamp.tar.bz2Hit Enter
Use Terminal to install Headless Plexamp -
Get your Plexamp token
To launch Plexamp for the first time you’ll need to get your token.
Enter this command in Terminal:
node plexamp/js/index.jsHit Enter
Plexamp will start in the background.
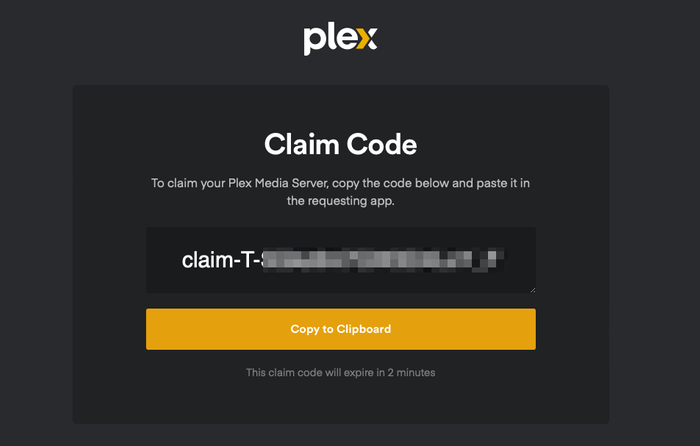
In your browser navigate to https://plex.tv/claim and copy the claim code presented.
Paste the claim code into your Terminal window.
Hit Enter then follow the prompt to name your player.
Get your Plexamp token -
Launch Plexamp in your browser
Then you’ll need to find the IP address for your Raspberry Pi. To do that, enter this command in Terminal:
hostname -IHit Enter
You’ll need to launch Plexamp again after the last step. To do that, enter this command in Terminal:
node plexamp/js/index.jsHit Enter
Now, copy the IP address and navigate to the following address in your web browser:
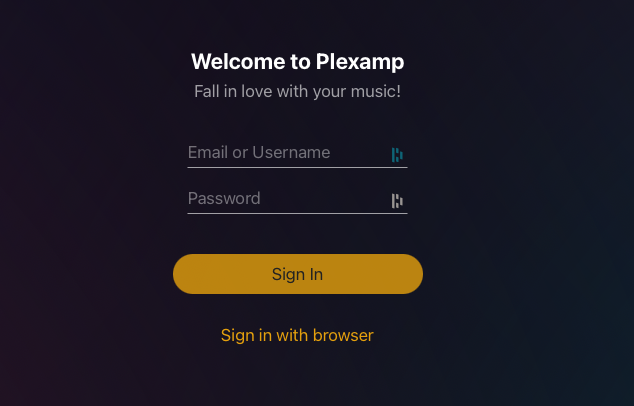
http://#.#.#.#:32500Replace the placeholder IP address in this example with your own and you should be presented with a screen to log in to Plexamp using your Plex Username and Password.
After entering your log in credentials you’ll be presented with some source options from your Plex server. Pick one to start with, you can easily change this later.
Launch Plexamp in your browser -
Check your Audio Settings and Select a Player
At this point you probably just want to start streaming. I’ve noticed that each time I set up a fresh Headless Plexamp install the intial audio stream will come out garbled and distorted, or won’t play at all.
If this happens to you, you may need to check a couple settings.
First, go to Settings → Playback → Audio Output → Audio Device
If an Audio Device is already selected, de-select and re-select. I typically just select headphones here and have a quick listen to make sure music is streaming as expected.
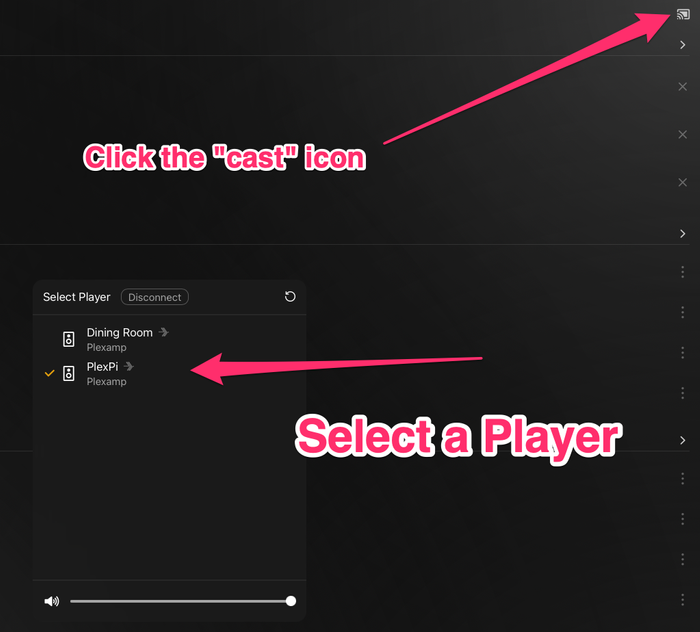
Second, make sure you Select a Player.
In the top right corner of the browser, click on the cast icon. You should see the Player you’ve just created in addition to any other Plex endpoints. If a Player is already selected, de-select and re-select your new Player.
Now have a listen 🎧
Check your Audio Settings and Select a Player -
Enable Plexamp to start automatically
The next thing you’ll probably want to do is to configure Plexamp to start up automatically everytime you power on your Raspberry Pi.
I’ve written a separate guide that will walk you through that process here: How to start Plexamp automatically when you power on your Raspberry Pi