If you’re somewhat new to using a Raspberry Pi for your hi-fi projects, you may have noticed that the default output options of the board don’t offer the best audio quality. One way to improve the sound quality of your Raspberry Pi is to use a DAC Hat, but many DAC Hats don’t work straight out of the box.
In this guide, I’ll take you through the steps I use to set up the InnoMaker RPI HIFI DAC and boost the sound quality of my Raspberry Pi running Headless Plexamp.
What is a DAC Hat?
A DAC Hat (Digital to Audio Converter Hat) is a piece of hardware that can be used to improve the sound quality of your Raspberry Pi. It converts digital audio signals into analog audio signals, resulting in improved sound quality.
How Does a DAC Hat Work?
A DAC Hat works by connecting to your Raspberry Pi via the GPIO pins. Once connected, it will convert digital audio signals into analog audio signals, which can then be sent to speakers or headphones, allowing you to get better sound quality from your Raspberry Pi.
For this post, I’m using the InnoMaker RPI HIFI DAC, which is a great choice if you’re on a budget. The guide should also work if you’re using a higher-end Allo Boss DAC Hat, but you can refer to the post specific to Allo Boss Dac 1.2 if you prefer.
How to set up InnoMaker RPI HIFI DAC hat for your headless Raspberry Pi

Follow this guide to improve the sound quality of your Raspberry Pi by configuring a DAC hat. With a DAC Hat, you can get considerably better sound quality from your Raspberry Pi.
Project Cost: $35 – $50
Total Time: 20 Min.
Tools and Supplies
Here is a list of tools and equipment that you should have on hand before you begin this project:
Tools
-
Terminal or another Command Line Interface tool
You’ll need to use Terminal or a similar Command Line Interface (CLI) to get access to configuration files in the Raspberry Pi. It will be helpful if you already have some experience with CLIs, but these steps should still be simple enough for someone without command line experience to follow.
Supplies
-
A Raspberry Pi 3 or 4
For this tutorial I am using a Pi 4 with the included power supply. If you don’t have a Raspberry Pi handy, I would recommend buying a Raspberry Pi 4 Starter Kit from CanaKit. They offer a variety of kits, but each configuration will include everything you’ll need to get started. In writing this tutorial I’m using a Raspberry Pi 4 with 4GB of RAM, but I’ve read user reports that a Raspberry Pi 3B+ and up should work, and reports that 2GB of RAM is sufficient.
-
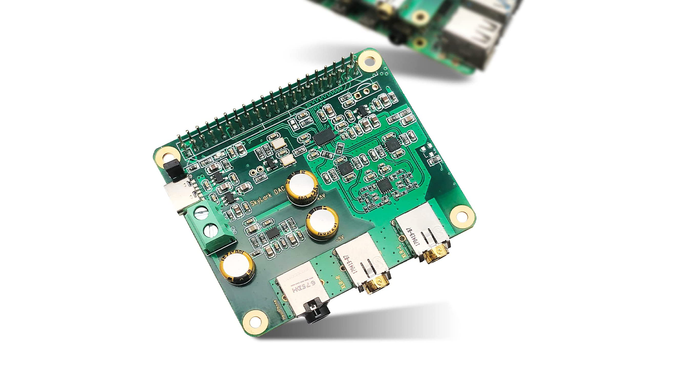
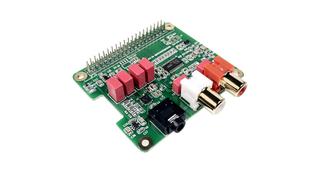
InnoMaker Raspberry Pi HiFi DAC HAT
Get the InnoMaker Raspberry Pi HiFi DAC HAT Board for Raspberry Pi 4 3 B+ Pi Zero etc. This is a great DAC option if you’re on a budget. I have two and I’m pretty happy with them.
-
Power off your Raspberry Pi and attach the DAC hat
To get started, you’ll need to connect the DAC Hat to your Raspberry Pi and configure it.
Power off your Raspberry Pi, and then attach the DAC hat to the GPIO pins. Once connected, you can power the Raspberry Pi back on.
-
SSH into your Raspberry Pi
If you’re following our Complete Guide to creating a Headless Plex Server with Plexamp endpoints using a Raspberry Pi you should already be familiar with how to SSH into your Raspberry Pi, but if you need a refresh you can visit the guide How To SSH or Secure Shell into your Raspberry Pi
On your computer, launch your command-line interface app (Terminal, in my case) and enter the following command, where username is the SSH username and hostname is the hostname you created in Raspberry Pi Imager:
ssh username@hostname.localThen hit Enter and follow the prompts as you normally would.
-
Enable the audio module for Allo Boss and InnoMaker RPI HIFI DAC
To add the InnoMaker RPI HIFI DAC hat option to the Raspberry Pi you will need to add a line of text to a configuration file.
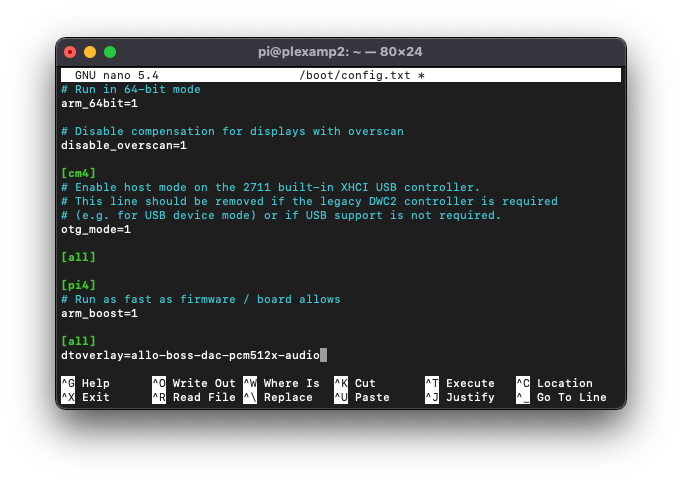
Use the following command to open the config.txt file
sudo nano /boot/firmware/config.txtScroll down to the bottom of that file and add the following text. Make sure it’s pasted exactly as you see it in the screenshot:
dtoverlay=allo-boss-dac-pcm512x-audioWith that new line added, hit the following key command to Write Out and save the file:
Control + O
Hit ENTER
Then exit the config file with the following key command:
Control + X
Enable the audio module for Allo Boss and InnoMaker RPI HIFI DAC -
Reboot the Raspberry Pi
This is a good time to reboot the Raspberry Pi with the following command:
sudo rebootHit ENTER
Then SSH back into the Pi:
ssh username@hostname.localHit ENTER
You may also need to re-enter your password.
-
Find the output device number for your DAC
With the DAC hat attached and enabled we’ll just need to find the device number. Check the device number with the following command:
aplay -lHit ENTER
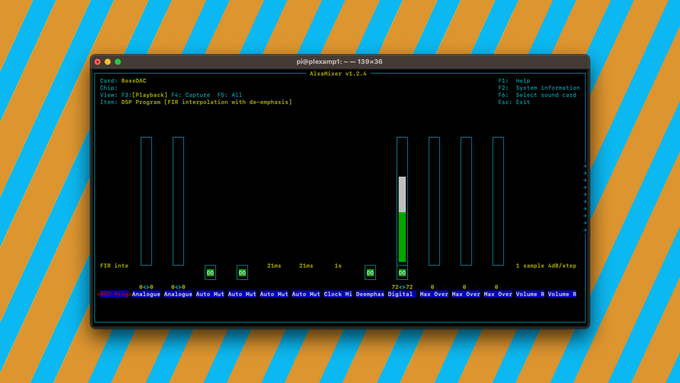
This should show you an initial list of devices. For the InnoMaker RPI HIFI DAC you’ll want to look for the BossDAC listing.
NOTE: sometimes this command returns an error instead of a list of devices. I’m not sure why, but if you see an Invalid argument error that suggests removing or fixing ALSA, go ahead and remove it with this command:
rm ~/.asoundrcIf you are asked to confirm the deletion, type yes
Hit ENTER
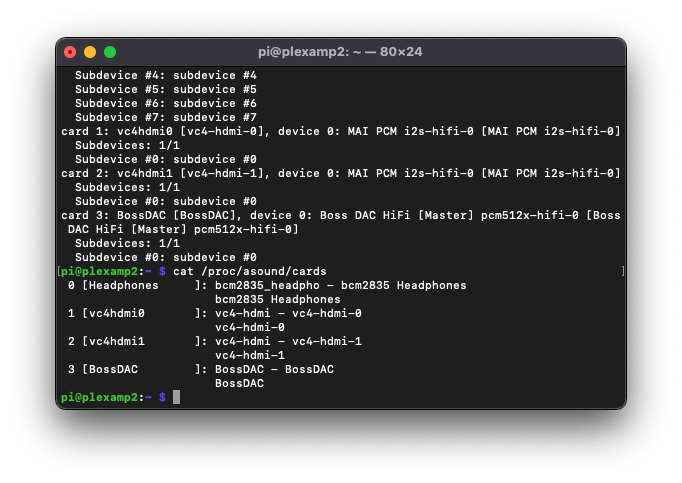
Then run the following command in Terminal:
cat /proc/asound/cardsHit ENTER
This will pretty much just confirm the device number of the DAC. You can see in the screenshot that the device number in my case is 3
Find the output device number for your DAC -
Set the device as the default soundcard
Now we’ll sent the device number we found as the default soundcard, which should automatically select the DAC as our output device each time you launch the Raspberry Pi.
Use the following command to create and open the sound config file:
sudo nano /etc/asound.confHit Enter
Now, paste the following code block at the bottom of the file:
pcm.!default  {
 type hw card 3
}
ctl.!default {
 type hw card 3
}
Remember to replace the card number with the device number you found in a previous step.
With that new line added, hit the following key command to Write Out and save the file:
Control + O
Hit ENTER
Then exit the config file with the following key command:
Control + X
-
Reboot the Raspberry Pi
This is a good time to reboot the Raspberry Pi with the following command:
sudo rebootHit Enter
Then SSH back into the Pi with the following command ( you know this one by now 😊 )
ssh username@hostname.localHit Enter
-
Access the Raspberry Pi config file to change the default audio settings
Now you’ll set the newly added DAC as your default audio output in the Raspberry Pi configuration menu.
Use the following command to open the Raspberry Pi configuration UI:
sudo raspi-configHit ENTER
Select System Options → Audio
Select BossDAC from the output list, then select Ok
Important: The device number in the audio output settings should match the device you set as the default soundcard. If it doesn’t, reboot the Raspberry Pi again and re-check
sudo raspi-config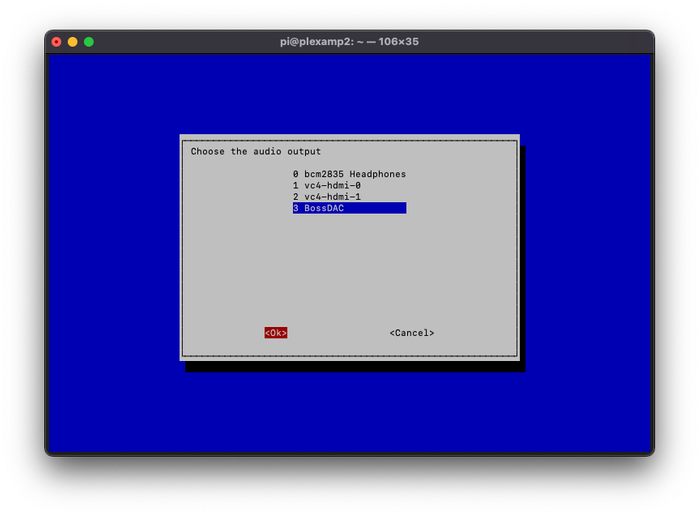
Access the Raspberry Pi config file to change the default audio settings -
Reboot the Raspberry Pi
Once the default audio output is properly set, you’ll need to reboot the Raspberry Pi with the following command:
sudo reboot -
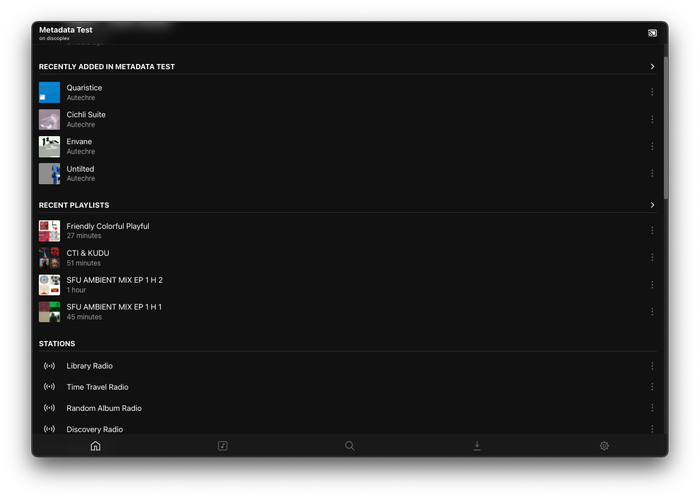
Launch Plexamp in your browser to see your device
If you’re using a Headless Plexamp player, you should now see the device in your list of Audio Device options.
Note: I’m assuming here that you have your Headless Plexamp configured to launch automatically when you boot up your Pi. If not, you’ll need to launch Plexamp manually.
To launch Plexamp manually enter this command in Terminal:
node plexamp/js/index.jsHit Enter
Then navigate to:
http://#.#.#.#:32500Remember to replace #.#.#.# with your Pi’s own IP address, which you can find with the following command:
hostname -INavigate to Settings → Playback → Audio Output → Audio Device. From there you’ll see the list of devices configured for your Plexamp Player.
Launch Plexamp in your browser to see your device -
Start Listening
At this point your Raspberry Pi should self-select the DAC hat, by default, each time you power up the Pi. You can test this hooking the output of the DAC to your AMP (or plug in your Headphones) and start streaming.
If that’s not the case the first thing you should do is reboot the Pi:
sudo reboot