If you have taken the time to attach and configure a DAC Hat to improve the quality of the audio coming from your Rapsberry Pi streamer, it’s possible that you’ve noticed the output is a bit “hot” and maybe even distorts at higher volumes.
One way to give your streaming output a little more headroom and allow your app volume controller (if you’re using Plexamp, for example) a bit more control and flexibility is to reduce the output level of your DAC Hat soundcard using AlsaMixer.
What is AlsaMixer?
AlsaMixer is a command-line audio mixer tool for the Advanced Linux Sound Architecture (ALSA). Using AlsaMixer you can adjust various audio settings of your DAC Hat or soundcard, including volume levels, balance, and other audio-related parameters, for both input and output audio devices.
To keep things simple in this post, we’ll focus on one simple solution to controlling the default volume levels of your DAC Hat.
How to use AlsaMixer to adjust the default output volume on your Raspberry Pi DAC Hat
Follow this simple guide to adjust the default volume output of your Raspberry Pi's DAC Hat using AlsaMixer. This will give you a bit more control and flexibility with the output level of your DAC Hat soundcard.
Project Cost: $0 – $0
Total Time: 5 Min.
Tools and Supplies
Here is a list of tools and equipment that you should have on hand before you begin this project:
Tools
-
Terminal or another Command Line Interface tool
You’ll need to use Terminal or a similar Command Line Interface (CLI) to get access to the AlsaMixer Interface on your Raspberry Pi. It will be helpful if you already have some experience with CLIs, but these steps should still be simple enough for someone without command line experience to follow.
Supplies
-
A Raspberry Pi
For this tutorial I am using a Pi 4 with the included power supply. If you don’t have a Raspberry Pi handy, I would recommend buying a Raspberry Pi 4 Starter Kit from CanaKit. They offer a variety of kits, but each configuration will include everything you’ll need to get started.
In writing this tutorial I’m using a Raspberry Pi 4 with 4GB of RAM, but I’ve read user reports that a Raspberry Pi 3B+ and up should work, and reports that 2GB of RAM is sufficient if you’re building for a Plex server (for example).
-
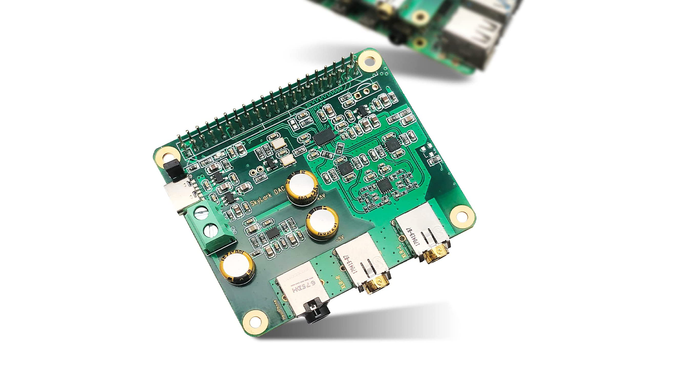
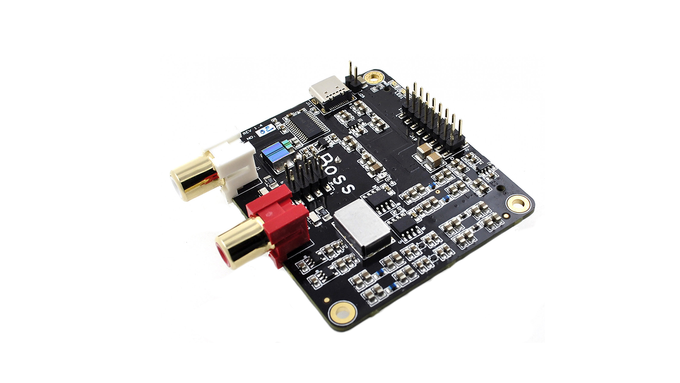
A DAC HAT or soundcard for your Raspberry Pi
I’ve been using a variety of DAC Hats from Innomaker and Allo on my Raspberry Pi boards, but the process here should work for just about any DAC or soundcard.
-
SSH into your Raspberry Pi
If you’re following our Complete Guide to creating a Headless Plex Server with Plexamp endpoints using a Raspberry Pi you should already be familiar with how to SSH into your Raspberry Pi, but if you need a refresh you can visit the guide How To SSH or Secure Shell into your Raspberry Pi
On your computer, launch your command-line interface app (Terminal, in my case) and enter the following command, where username is the SSH username and hostname is the hostname you created for your Pi:
ssh username@hostname.localThen hit Enter and follow the prompts as you normally would.
-
Access the AlsaMixer interface
To access the AlsaMixer interface and adjust some output settings, enter the following command in your CLI or Command-Line Interface:
alsamixer
Access the AlsaMixer interface -
Navigate the AlsaMixer Interface
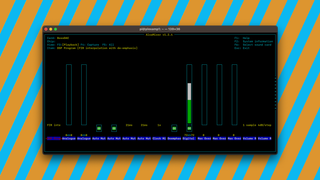
You should now see the AlsaMixer interface which has a variety of settings. We’re going to focus on one specific setting right now – Digital gain. You can see in the screenshot that my current AlsaMixer Digital gain is in the red. That’s typical, but when I listen to music using the headphone jack on my Raspberry Pi DAC Hat, it sounds a little bit distorted.
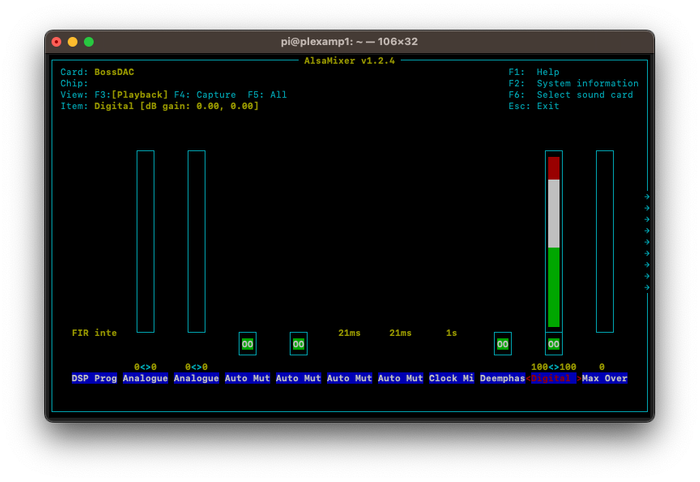
Navigate the AlsaMixer Interface -
Lower the AlsaMixer Digital Gain
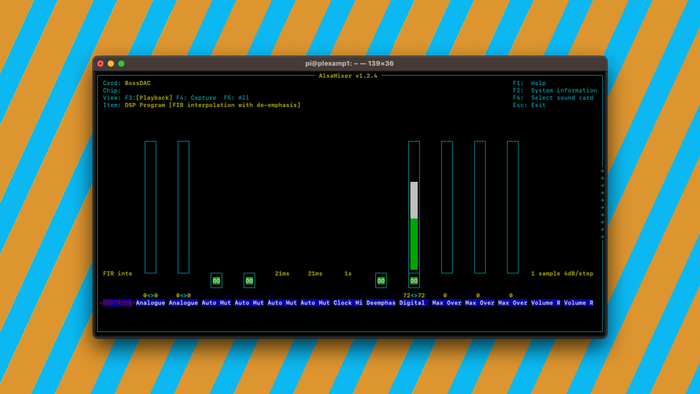
Use the Right-arrow key on your keyboard to navigate over to the Digital level (you’ll see the names of each setting highlight as you arrow across)
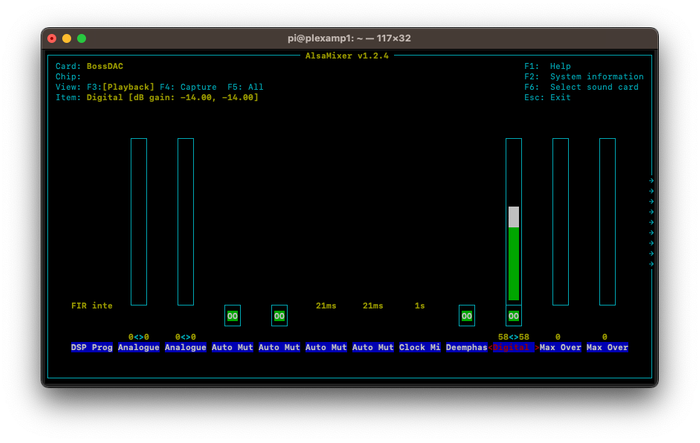
When you reach the Digital output setting, use the Down-arrow to lower the total output to a more approachable level.
My suggestion is to start by getting the setting out of the red (so, somehwere around 89-90) then adjust as needed.
You can stream audio while you make the adjustment.
Lower the AlsaMixer Digital Gain