Plex Media Server is a great option if you’re looking for a way to manage your digital media. A basic, free version of the service is all you need to create a shareable, streamable access point for your digital music and movie libraries.
Setting up a Plex Media Server is as simple as installing the app on your laptop or desktop computer and going through the process of adding libraries, but this article will take you through the process of using a Headless Raspberry Pi as a dedicated Plex Media Server instead of using your personal computer.
The advantage to using a Raspberry Pi as a dedicated Plex Media Server is that it will be “always-on”. You’ll be able to access your library on your mobile device, laptop or desktop computer (including while traveling), and you won’t need to worry about keeping your home desktop computer in awake mode to stream from your Plex Media Library.
If this is your first time setting up a Plex Media Server using a Raspberry Pi, it might take around 20-30 minutes from start to finish. With a little more experience this can be done in around 5 minutes.
You’ll need to use Terminal or a similar Command Line Interface (CLI) to turn your Raspberry Pi into a headless Plex Media Server. It will be helpful if you already have some experience with CLIs, but these steps should still be simple enough for someone without command line experience to follow.
Create a Headless Plex Media Server with a Raspberry Pi
Use this simple guide to create a Headless Plex Media Server with a Raspberry Pi. Stream your personal media library, Music, Movies, and more.
Project Cost: $85 – $150
Total Time: 25 Min.
Tools and Supplies
Here is a list of tools and equipment that you should have on hand before you begin this project:
Tools
-
A Micro SD to USB Card Reader
A USB Card Reader to mount the Micro SD card to your laptop or desktop computer. If you elect to purchase a Raspberry Pi 4 Starter Kit, make sure you pick one that includes a USB Card Reader.
Supplies
-
A Plex Account
You can create a Free account on the Plex website. No credit card or payment is required for the basic plan.
-
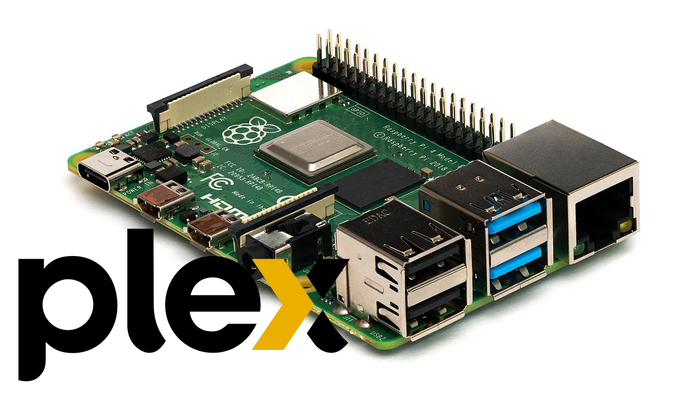
A Raspberry Pi 4
If you’ve been following our previous tutorials on Setting up a Headless Plex Media Server Using a Rapberry Pi, you should already have this ready to go. In writing this tutorial I’m using a Raspberry Pi 4 with 4GB of RAM, but I’ve read user reports that a Raspberry Pi 3B+ and up should work, and reports that 2GB of RAM is sufficient if you’re building for a Headless Plex server. If you still need a Raspberry Pi I would recommend buying a Raspberry Pi 4 Starter Kit from CanaKit. They offer a variety of kits, but each configuration will include everything you’ll need to get started.
-
A Micro SD card
If you’ve been following our previous tutorials on Setting up a Headless Plex Media Server Using a Rapberry Pi, you should already have this ready to go.
If you elect to purchase a Raspberry Pi 4 Starter Kit, make sure you pick one that includes a Micro SD card with 4–8 GB of storage.
-
SSH into your Raspberry Pi
SSH into your Raspberry Pi running Raspberry Pi OS Lite and run the following commands to ensure your Raspberry Pi OS Lite is up to date
sudo apt-get update && sudo apt-get upgradeSometimes this process can take a few minutes. As long as your Terminal window is still scrolling everything should be working as intended, but watch for prompts where you may need to acknowledge some installations and upgrades.
If you need help with SSH or Secure Shell you can refer to the previous post in this series – How To SSH or Secure Shell into your Raspberry Pi
-
Install the transport package
Run the following command to Install the transport package which will enable adding Plex Media Server to your Raspberry Pi Raspberry Pi OS Lite.
sudo apt-get install apt-transport-httpsThis process might take a minute or two.
-
Install a key to access the Plex Media Server repositories
Now you need to install a key to access the correct repositories for your Headless Plex Media Server.
Run the following Command:
curl https://downloads.plex.tv/plex-keys/PlexSign.key | gpg --dearmor | sudo tee /usr/share/keyrings/plex-archive-keyring.gpg >/dev/nullThis should only take a second to install.
-
Include Plex Media Server in the list of sources available to your Raspberry Pi OS Lite
Add Plex Media Server to your Raspberry Pi OS Lite sources list with the following command:
echo deb [signed-by=/usr/share/keyrings/plex-archive-keyring.gpg] https://downloads.plex.tv/repo/deb public main | sudo tee /etc/apt/sources.list.d/plexmediaserver.listThis should only take a second to install.
-
Update your Raspberry Pi OS
And just to be comprehensive, you should now run another update on your Raspberry Pi OS Lite. Run this command:
sudo apt-get updateThis time the update should be pretty quick.
-
Install the Plex Media Server Package to your Raspberry Pi
Now we can finally install the Plex Media Server Package to your Raspberry Pi OS Lite.
In the same Terminal window run the following command:
sudo apt install plexmediaserverYou may need to confirm some default options during the installation. If things seem to have stalled just read any messages in the terminal window and confirm them.
-
Find the IP address for your Raspberry Pi
Best practice is to use a static IP address for your Plex Media Server to ensure reliable usage.
Let’s find out what the current IP address is with the following command:
hostname -IThen copy and save the IP address. The format will be #.#.#.# and it will look something like this:
0.0.1.24 2601:5631:e190:68d3:500f:e970:e970You just want those first 4 numbers and you can ignore anything that comes after.
-
Open cmdline.txt file to update the IP address for your Raspberry Pi
Save the IP address from the previous step somewhere, then run the following command in your terminal:
sudo nano /boot/cmdline.txtThis will take you to a slightly different UI in Terminal to edit the cmdline.txt file. Use your keyboard arrows to navigate down to a new line (↓)
-
Add the Static IP address to your Raspberry Pi
In cmdline.txt, on the new line you arrowed down to, add your IP address using the following format:
ip=#.#.#.#Replace #.#.#.# with the IP address you previously copied and saved.
-
Save your changes
Save the change to the IP address for your Raspberry Pi with the following Keyboard commands:
control + xThen
Y (or Yes)Hit Enter if you’re not automatically taken back to the previous Terminal view.
-
Reboot your Raspberry Pi
Almost there.
Now you can reboot your Raspberry Pi to get your Headless Plex Media Server up and running with the following command:
sudo rebootThis might take a minute or two. Terminal might appear frozen during reboot, so be patient.
-
Open Plex Media Server in your browser
To complete the set up you now just need to open Plex Media Server in your browser by navigating to the following url:
#.#.#.#:32400/web/once again, you’ll need to replace #.#.#.# with the IP address you previously copied and saved.
You’ll be prompted to sign in to your Plex account (you can also create a new account at this stage). Make note of this URL as it may come in handy sometimes if you want to tinker with the local version of your Plex server.
-
Set Up Plex Media Server in your Browser
At this point you’ll be taken through some steps to finish setting up your Plex installation in the browser.
Most of these steps are self explanatory. We’ll get into adding additional Libraries for your Headless Plex Server in the next articles!