I have published a previously written guide to Install Headless Plexamp for your Raspberry Pi to create a Plex endpoint and that guide has been particularly helpful for a lot of folks ( judging by the number of comments it has received, anyhow )
The goal of that previously written guide was pretty simple; document one way to use a Raspberry Pi as a Headless Plexamp endpoint, and make the process as uncomplicated as it can be. This goal was set by me because I wanted to use Plexamp to it’s fullest potential ( Plexamp is by far my favorite music app ), but the process for installing a fully working Headless Plexamp endpoint using a Raspberry Pi was not well documented at the time ( it still may not be, tbh )
The guide worked very well for over a year, and I’ve kept it updated with each new Plexamp release. Then Node made some changes to how specific versions could be installed, and … well, it seems like they’re still working through some stuff because it no longer seems very straightforward at all to just install Node 16 ( which is the version that Plexamp uses )
I did eventually figure out a way to get the correct version of Node installed and used by the Rapsberry Pi, but it required a new step and and additional package to install ( Node Version Manager ). I updated the aforementioned guide and the follow up guides. Everything works again, but it feels a little sloppier than it used to.
During my troubleshooting to find a solution to the Node problem, I embarked on a quick sidequest to finally try out OdinB’s Headless Plexamp installation script. I had read about the script on various forums and many folks spoke very highly of its simplicity. After having tried it out I don’t disagree, so I’ve written a seperate guide using the OdinB script as an alternative to my own.
OdinB’s script is certainly more efficient at getting the correct Node version installed, and the GitHub repo where the script is stored appears to be updated regularly, which is a good sign.
I figure that between the two guides most users should be well-served for getting up-and-running with Headless Plexamp.
Shoutout to @odinb for the great script!
How To Create a Headless Plexamp Player Using OdinB's Plexamp Installer Script

Use this guide to install Headless Plexamp to your Raspberry Pi using the script created by OdinB.
Project Cost: $85 – $136
Total Time: 10 Min.
Tools and Supplies
Here is a list of tools and equipment that you should have on hand before you begin this project:
Tools
-
A Plex Account
If you’re following our Complete Guide to creating a Headless Plex Server with Plexamp endpoints using a Raspberry Pi you’ll already have a Plex Server up and running.
Note: Plexamp is an add-on to your Plex Media Server. A Plex Pass is required to run Plexamp in a Headless configuration.
Supplies
-
A 64-bit capable Raspberry Pi
If you don’t have a Raspberry Pi handy, I would recommend buying a Raspberry Pi 4 Starter Kit from CanaKit. They offer a variety of kits, but each configuration will include everything you’ll need to get started. In writing this tutorial I’m using a Raspberry Pi 4 with 4GB of RAM, but I’ve read user reports that a Raspberry Pi 3B+ and up should work, and reports that 2GB of RAM is sufficient.
-
Install Raspberry Pi OS
If you’re following our Complete Guide to creating a Headless Plex Server with Plexamp endpoints using a Raspberry Pi you should already be familiar with Raspberry Pi Imager.
If you need a refresher on what Raspberry Pi Imager is and how to use it you should revisit the guide A Beginner’s Guide to Installing Raspberry Pi OS Lite.
For this guide I’m using Raspberry Pi OS Lite (64-bit)
In the advanced settings fill out all the necessary information. To keep things simple your username for this project should be pi. If your username is different there will just be an additional step to take.
After Raspberry Pi OS has been installed on your Micro-SD card you can insert it into your Raspberry Pi and power it on.
-
SSH into your Raspberry Pi
With Raspberry Pi OS installed on your Micro-SD card and your Raspberry Pi powered on you’ll want to make sure you can SSH into the Pi.
If you’re following our Complete Guide to creating a Headless Plex Server with Plexamp endpoints using a Raspberry Pi you should already be familiar with how to SSH into your Raspberry Pi, but if you need a refresh you can visit the guide How To SSH or Secure Shell into your Raspberry Pi
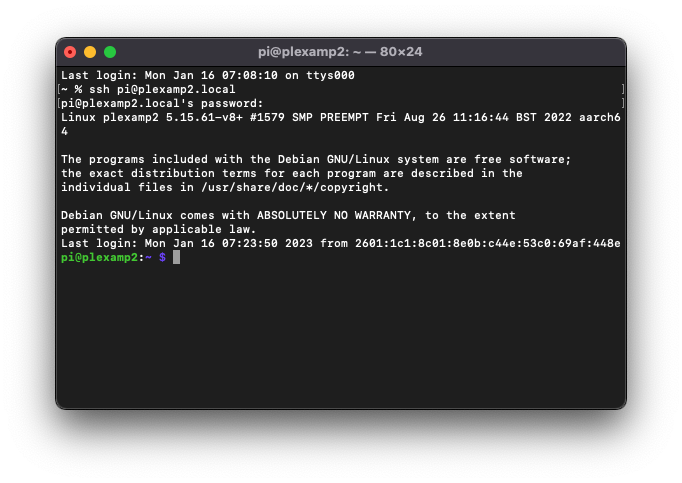
On your computer launch your command-line interface app (Terminal, in my case) and enter the following command, where username is the SSH username and hostname is the hostname you created in Raspberry Pi Imager:
ssh username@hostname.localThen hit Enter and follow the prompts as you normally would.

SSH into your Raspberry Pi -
Switch to the Root user of your Raspberry Pi
Run the following command to switch to Root user
sudo -i -
Install the OdinB Plexamp Installer Script
OdinB keeps their Plexamp installer on GitHub, but it’s not necessary to have a GitHub account to install Headless Plexamp using the script.
Just run this command to install the script:
bash <(wget -qO- https://raw.githubusercontent.com/odinb/bash-plexamp-installer/main/install_Plexamp_pi.sh) -
Run through the Plexamp installation steps
The OdinB script will present a series of prompts for you to set up your Raspberry Pi to run Plexamp Headless. There are quite a few prompts. I’ll outline them here and note what settings I’ve used.
- Do you want to change hostname? – This is optional. It’s simpler to leave the hostname as you started when you installed Raspberry Pi OS. If you change your hostname you’ll also need to change the way you log in
- Do you want to create or change user? – This step will helpfully update your username in the plexamp.service file, which might save you some config headaches later on. If your username is something other than pi, enter your new username here
- Pick a timezone – I just pick the same timezone I used when I installed my Raspberry Pi OS. I’m not sure if there would be any conflict if you don’t update here. I suggest just updating
- Enter your password – Pretty self explanatory – enter the password you set up for your Raspberry Pi
- Should you install and set VIM as your default editor? – If you don’t know what it means to install and set VIM, then just say N here. I say no to this as Terminal works just fine as is.
- Do you want to disable IPv6? – If you don’t know what it means to disable IPv6, then just say N here (I’m not sure what the benefits are of disabling this, so I say no here)
- Do you want to configure you HiFiBerry Hat? – If you’re using a HiFiberry hat then say y here, but if you’re using something else say N as some additional options for Allo DAC Hats and HDMI will be available in the next step. You can always configure a different DAC hat later (see our guides for InnoMaker RPI HIFI DAC and Inno-Maker HIFI DAC PRO)
- Do you want to prep for upgrade/reinstall of version? – If you’re installing Plexamp for the first time, you should say N here. If you’re updating to the latest version then say y
- Do you want to install/upgrade and configure Node.v20? – Say y here. Node20 is required for Plexamp Headless 4.10 and above. This is a simple way to get it installed
- Do you want to install and configure Plexamp-Linux-headless-vx.x.x? – This is why we’re here, so say y here
- Do you want to run full OS-update? – Say y here
Once you’ve run through all these prompts, proceed to the next step.
-
Reboot the Raspberry Pi
Reboot your Raspberry Pi with the following command:
sudo rebootHit Enter
-
SSH back into the Raspberry Pi and launch Plexamp
You should now see a big PLEXAMP message indicating that Headless Plexamp is installed.
Enter the following command to launch Plexamp:
node /home/USERNAME/plexamp/js/index.jsRemember to replace USERNAME with your actual username (usually this would be pi unless you’ve changed it)
Hit Enter
Plexamp will start in the background.
-
Get your Plexamp token
In your browser navigate to https://plex.tv/claim and copy the claim code presented.
Paste the claim code into your Terminal window.
Hit Enter then follow the prompt to name your player.
-
Launch Plexamp in your browser
Then you’ll need to find the IP address for your Raspberry Pi. To do that, enter this command in Terminal:
hostname -IHit Enter
You’ll need to launch Plexamp again after the last step. To do that, enter this command in Terminal:
node plexamp/js/index.jsHit Enter
Now, copy the IP address and navigate to the following address in your web browser:
http://#.#.#.#:32500Replace the placeholder IP address in this example with your own and you should be presented with a screen to log in to Plexamp using your Plex Username and Password.
After entering your log in credentials you’ll be presented with some source options from your Plex server. Pick one to start with, you can easily change this later.
-
Check your Audio Settings and Select a Player
At this point you probably just want to start streaming. I’ve noticed that each time I set up a fresh Headless Plexamp install the intial audio stream will come out garbled and distorted, or won’t play at all.
If this happens to you, you may need to check a couple settings.
First, go to Settings → Playback → Audio Output → Audio Device
If an Audio Device is already selected, de-select and re-select. I typically just select headphones here and have a quick listen to make sure music is streaming as expected.
Second, make sure you Select a Player.
In the top right corner of the browser, click on the cast icon. You should see the Player you’ve just created in addition to any other Plex endpoints. If a Player is already selected, de-select and re-select your new Player.
Now have a listen 🎧
-
Enable Plexamp to start automatically
The next thing you’ll probably want to do is to configure Plexamp to start up automatically everytime you power on your Raspberry Pi.
I’ve written a separate guide that will walk you through that process here: How to start Plexamp automatically when you power on your Raspberry Pi


