While running through the list of availble one-click software installation options that ships with Raspberry Pi Imager I was pleasantly surprised to see VOLUMIO in the list of music player Operating Systems.
I’ve previously published a guide for how to Install Volumio 3.3 UNIVERSAL to create an Airplay streaming endpoint with a Raspberry Pi and Balena Etcher, and that process is pretty straighforward, but I now find that using Raspberry Pi Imager for installing VOLUMIO is more convenient and fewer steps.
If you’re not familiar with volumio you can read on, otherwise go ahead and jump ahead to the how-to guide to begin installation.
What is VOLUMIO?
Volumio, the open-source music player designed for audiophiles, offers an exceptional music listening experience that allows users to enjoy their favorite tracks in high fidelity.
With Volumio, music lovers can easily manage their music collection, stream music from various sources, and control playback from many devices. The platform offers support for a wide range of audio formats, including FLAC, MP3, AAC, and WAV. It also supports popular streaming services such as Tidal, Qobuz, and Spotify.
Volumio’s intuitive interface makes it easy to customize the user’s listening experience with a range of settings and options. For example, users can adjust the equalizer settings to fine-tune the sound to their liking, or create playlists that match their mood.
Volumio is also highly customizable, with a range of plugins that allow users to add new features and functionality to the platform. Whether you want to add support for new audio formats, integrate with smart home devices, or add a visualizer to your music playback, there’s a plugin for that.
A Faster way to Install VOLUMIO as an Airplay Endpoint using Raspberry Pi Imager
Use Raspberry Pi Imager to quickly install Volumio. Create an Airplay enabled network streamer using Volumio and a Raspberry Pi microcomputer. Stream Tidal, Spotify, Apple Music, Qobuz and more.
Project Cost: $0 – $0
Total Time: 5 Min.
Tools and Supplies
Here is a list of tools and equipment that you should have on hand before you begin this project:
Tools
-
A USB Card Reader
A USB Card Reader to mount the Micro SD card to your laptop or desktop computer. If you elect to purchase a Raspberry Pi 4 Starter Kit, make sure you pick one that includes a USB Card Reader.
Supplies
-
A Raspberry Pi 3 or 4
You can use an earlier model, but for this tutorial I am using a Pi 4 with the included power supply.
I would recommend buying a Raspberry Pi 4 Starter Kit from CanaKit. They offer a variety of kits, but each configuration will include everything you’ll need to get started.
The suggested hardware is Raspberry Pi 4, with 2GB of RAM (4 and 8GB are overkill). Pi Zero is not suggested: Volumio works but, it’s very slow and unresponsive.
-
A Micro SD card
A Micro SD card with a minimum of 4 to 8 GB storage space. If you elect to purchase a Raspberry Pi 4 Starter Kit, make sure you pick one that includes a Micro SD card.
-
Download the official Raspberry Pi Imager software
Your Raspberry Pi needs an operating system to work. Using Raspberry Pi Imager will provide us with a shortcut to install VOLUMIO as the operating system for this project.
Download Raspberry Pi Imager from raspberrypi.com/software/
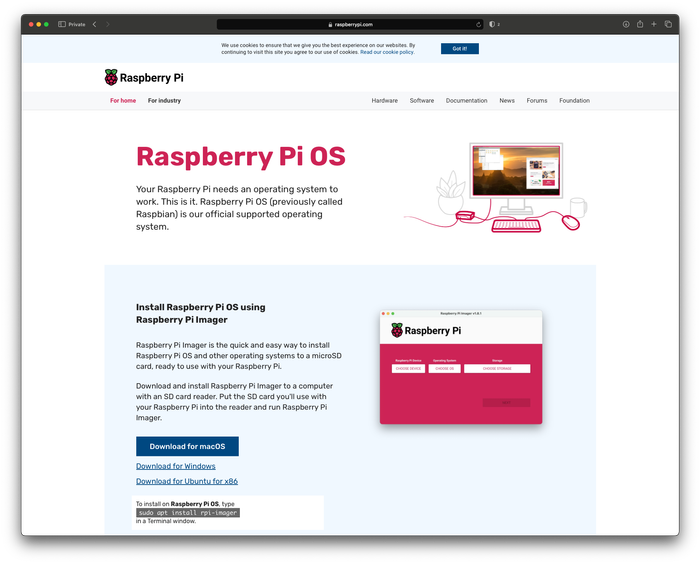
Download the official Raspberry Pi Imager software -
Add Raspberry Pi imager to your Applications folder
One you’ve downloaded Raspberry Pi Imager, go ahead and add it to your Application folder.
This Applications will come in handy for future Raspberry Pi projects because it allows for quite a bit of up-front configuration using a simple, straightforward interface.
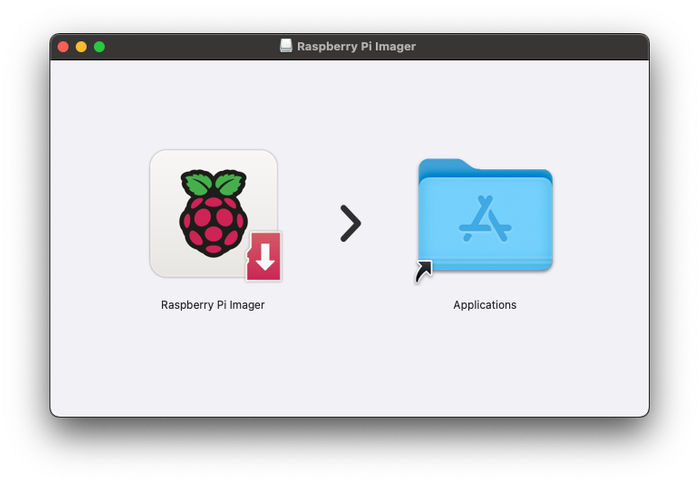
Add Raspberry Pi imager to your Applications folder -
Mount your Micro SD card using your Micro SD card reader
Add the Micro SD card to your Micro SD USB card reader and plug it into your desktop or laptop computer. This should boot automatically and Raspberry Pi imager will be able to find the drive.
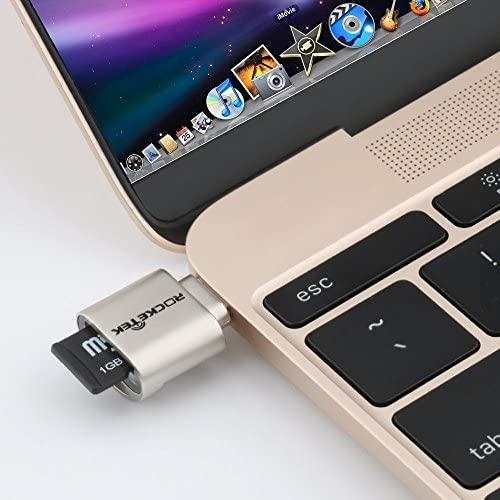
Mount your Micro SD card using your Micro SD card reader -
Select the VOLUMIO Operating System for your Raspberry Pi
Launch Raspberry Pi Imager and click the Operating System button.
Click the option that says Media Player OS and you’ll be presented with some additional options. Click the option for Volumio.
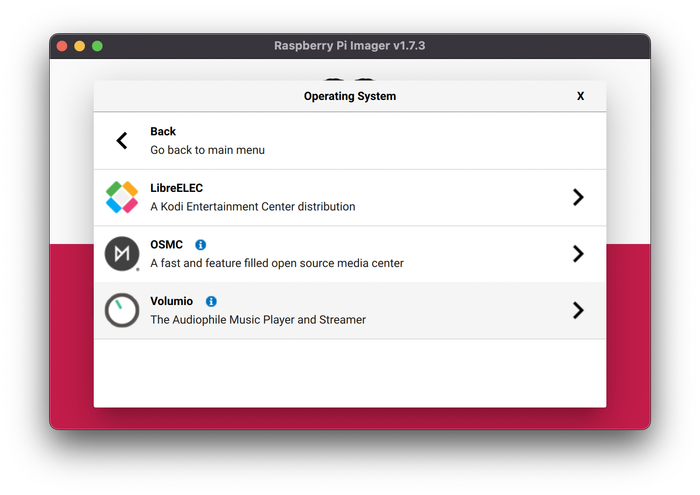
Select the VOLUMIO Operating System for your Raspberry Pi -
Select VOLUMIO installation option in Raspberry Pi Imager
You’ll be take to yet another screen with a little more detail about the Volumio installation. Click Volumio to select it as the OS to install.
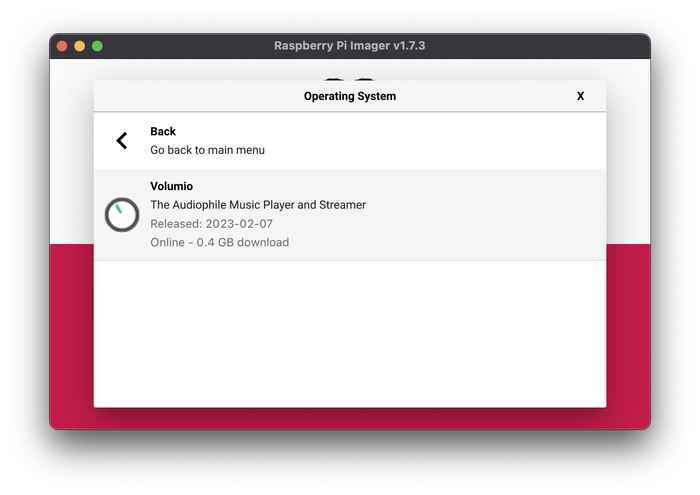
Select VOLUMIO installation option in Raspberry Pi Imager -
Select the Micro SD card as your OS destination drive
Back in the main Raspberry Pi Imager menu, click the button that says Choose Storage
You’ll want to select your Micro SD card from the menu. If more than one option appears, look for something called Generic- SD Card Media

Select the Micro SD card as your OS destination drive -
Write the VOLUMIO OS to the Micro-SD card
Now Click the button named Write, confirm the installation and give Raspberry Pi Imager a few minutes to install Volumio.

Write the VOLUMIO OS to the Micro-SD card -
Mount your Volumio OS flashed Micro SD card to your Raspberry Pi
Remove the Micro SD card from the USB card reader and mount it directly into your Raspberry Pi. Power your Raspberry Pi using the included power adapter and wait a minute or two for Volumio OS to launch.
We’ll be using the Raspberry Pi as a Wi-Fi enabled streaming endpoint only. It will essentially be a headless set-up, so you don’t need a monitor or screen to observe anything here.
Mount your Volumio OS flashed Micro SD card to your Raspberry Pi -
Join the Volumio Wi-Fi Network
Once the Raspberry Pi has successfully launched you’ll see a new Wi-Fi network available for you to join. The easiest way to finish setting up your Volumio Airplay streaming endpoint is to simply join the Volumio Wi-Fi network, which will automatically launch an interface for Volumio.
Look for a wireless network called Volumio-0DH87 (Those last 5 digits will be different for you, but you get the idea)
Note: If the new Volumio Wi-Fi network requires a password, try Volumio2
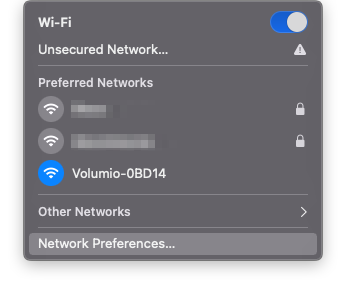
Join the Volumio Wi-Fi Network -
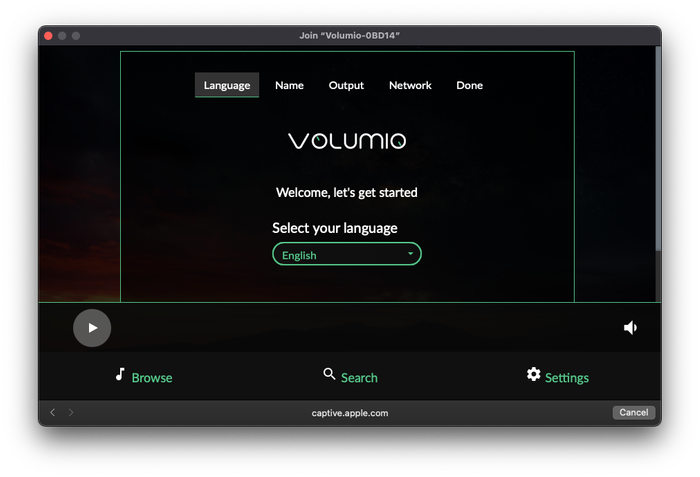
Set up your Volumio account in the Volumio OS interface
Work through the steps to set up your Volumio account. It’s all pretty straightforward and any steps that you don’t feel like doing right now can be skipped. You can make changes later in the Volumio UI.
- Select a language
- Give your device a name
- Select your output (optional; select Headphones, HDMI, or DAC Hat)
- Connect to your local wireless network
If you have a DAC for your Raspberry Pi 4 you can select a driver for it, but you can set this up later as well.
Set up your Volumio account in the Volumio OS interface -
Connect your Airplay device to Volumio and start streaming
Now you should see your new Volumio endpoint available as an option for your Airplay enabled devices. I’ve named my Raspberry Pi with Volumio endpoint VolumioHi-Fi , so that’s what I connect to.
Start streaming from Tidal, Spotify, YouTube or any other media service that you use to listen to music. The audio will now be delivered to your Raspberry Pi Volumio endpoint, which you can connect to your stereo or amplifier.
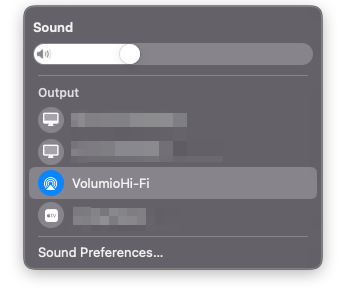
Connect your Airplay device to Volumio and start streaming -
Connect to the Volumio user interface in your web browser
Now that Volumio is installed and available as an Airplay streaming endpoint, you may want to change some settings or add some music.
To access the Volumio user interface just open a web browser and navigate to http://volumio.local
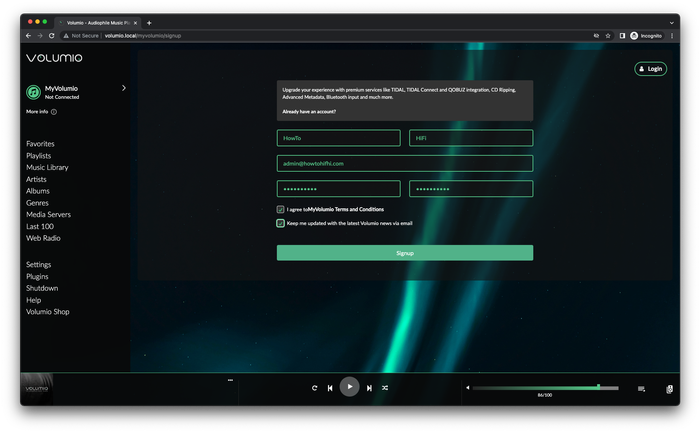
Connect to the Volumio user interface in your web browser